Showing posts with label recipe. Show all posts

Sunday, May 3, 2020

Dandelion Jelly

Sometime this spring, I stumbled across the idea of dandelion jelly. I think it was a Facebook post from Mother Earth News, but I can’t be sure. When I looked out the front door yesterday morning, and saw all the dandelions in our yard, I decided to make some.
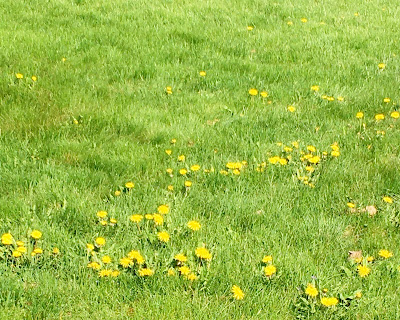
Just a few of the dandelions in our front yard.
I grabbed a big ol’ plastic bowl, and headed out around 9:30 in the morning. It had rained overnight, but the lawn was drying out, and the dandelions were perking up for the day. One interesting thing about foraging like this is that I wasn’t the only one after the little yellow blossoms. After I grabbed my first black slug (and apologized to the little thing profusely), I became more aware of my competition. Quite a few tiny green leafhoppers were hanging out on the dandelion heads, and the honeybees were out working busily. Part of me was concerned that I was taking food away from these creatures that we share the world with, but every time I stood up, stretched my back, and gazed over the yard, I saw there were plenty for all.
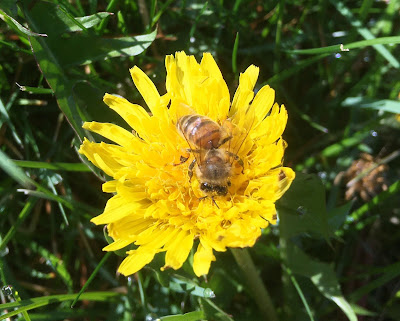
My buzzing competition.
My squishy competition.
I have to say, I am glad I am in fairly good health and physical condition. There was a lot of squatting involved in picking dandelions. It took about an hour to fill my bowl, and when I brought my haul back into the house, our cat was duly impressed.
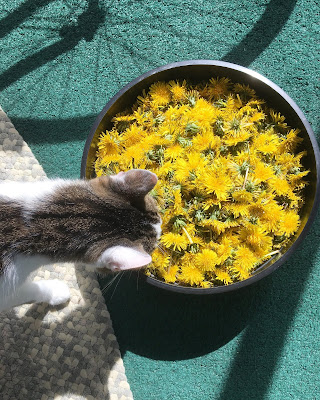
He does seem impressed, right?
Okay, so now I had a giant bowl of dandelion heads, an impressed cat, and very sticky, orange hands. The next step was to pull all the yellow bits of the blossom off the green parts. (Can you tell I’m a historian, not a botanist?) I did this by twisting the base of the flower, and plucking the petals out in clumps. In a way, it felt like plucking a chicken, but I’ve never done that before either, so I’m just guessing.

After a little over an hour of blossom plucking, my husband joined in the efforts. Maybe another hour later, we finally had four lightly packed cups of dandelion bits with which I was to make a tea.
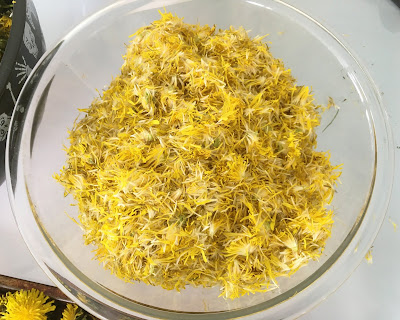
We stopped plucking when I had just enough done, and I actually returned maybe a quarter of the dandelion heads I had picked to nature.
Before starting all of this, I asked Mr. Google for a dandelion jelly recipe. I found quite a few, and ended up choosing one from Lonely Pines Farm. So, as guided by this recipe and all of the others I found online (there really is very little difference in the recipes out there), I poured four cups of boiling water over my pluckings, and let it steep 24 hours. The tea smelled a bit like steamed asparagus to me.
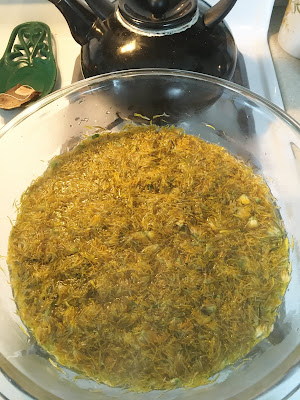
Dandelion tea just beginning to steep.
And dandelion tea after 24 hours.
 After straining the tea through cheesecloth to pull out all the flowery bits, I added the tea, two tablespoons of lemon juice, and one box of Sure Jell to a pot and brought it to a boil. I added four cups of sugar, brought it to a boil again, and let it boil for about two minutes. Then I ladled it into waiting jars. I filled seven small jelly jars and three half-pint jars. The jars then went into a hot water bath for ten minutes. I had gotten the water bath going before I even strained the tea so it had time to get up to a boil.

Jars of dandelion jelly straight out of the bath.
Some people online wrote that dandelion jelly tastes like honey, others that it tastes like sunshine, or joy. It certainly has a honey quality to it. I just tried a little off a spoon, and now I want waffles.  
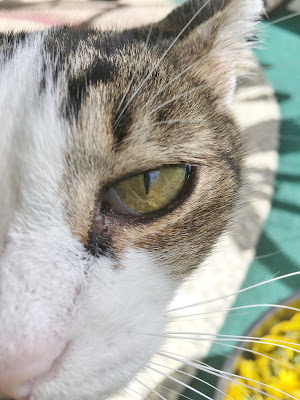
He actually wasn’t that impressed.


Sunday, August 30, 2015

Putting Up Our Harvest

Years ago, when we lived on the mountain, we had to buy a chest freezer to store all the extra produce from our garden. We have no plans on plugging that freezer in this year but we still have more vegetables from the garden than we can eat fresh. So, here are some of the things we did with the extra veggies.

So many tomatoes!
I intended to make a big batch of cucumber pickles when it wasn’t too hot out. Unfortunately, we had a very dry spell after a very wet spell and that stressed out the plants enough that the cucumbers went bitter. I felt really bad throwing dozens of cucumbers into the compost but they just weren’t edible. I did have a small heap of cucumbers from before the plants turned. There weren’t enough to warrant pulling out the water-bath canner so I made a small batch of freezer pickles instead.

I used the recipe for Freezer Dills in the book Farm Anatomy by Julia Rothman. (This is a great little book, by the way, with lots of basic information and beautiful illustrations.) The recipe is also available on Grit magazine’s website.  I have yet to try them but I’m sure they will be a wonderful treat when the snow starts flying.

Pickles in the freezer
I also decided to pickle turnips. I had not heard of pickled turnips before but the power of Google showed me that they were, indeed, a thing. So, I decided to give them a try. There are a bunch of recipes available online. I ended up using one from Eating Well. I filled two quart jars and look forward to trying them.

Turnip pickles
Back in June I made two jars of pak choi refrigerator pickles. We got into them last week. They are very vinegary (maybe a bit too vinegary for some people’s tastes) but they are really good on hotdogs. The white stem parts are nice and crunchy. I’m definitely going to plant more pak choi next year.

During the winter, I bring soup to work every day for lunch. During the summer, it feels odd to make soup but with all the wonderful fresh vegetables coming out of the garden I had to make a batch of minestrone soup. There are a lot of recipes out there for summer minestrone. The August issue of Cooking Light magazine has a good recipe and it happened into my mailbox just as I was wondering what to do with all my veggies. Homegrown carrots, green onions, tomatoes, squash, green beans and chard all went into my massive soup pot along with cannellini beans and ditalini pasta to make a wonderfully hearty soup. We ate some for dinner and I put the rest (three quart-bags full) into the freezer for later.

Bags of summer minestrone in the freezer
We are currently being inundated with tomatoes. I love fresh tomatoes on sandwiches and salads but it’s beginning to get out of hand. I don’t want to throw out any because I didn’t get to use them in time. So, today I made some tomato juice. I was going for tomato sauce but we didn’t grow sauce tomatoes so it was a bit more watery. No problem. The juice will be a great base for soups and sauces. All I did was cut up the tomatoes and simmer then for about 45 minutes. Then I pushed them through a sieve with a wooden spoon to get rid of the skins and seeds. (This is one time when I really miss my mom’s old food mill.) I then put the juice into zip-top sandwich bags in 1-cup servings. I laid them flat on a cookie sheet and put them in the freezer. Once they are frozen, I will transfer them to a gallon size freezer bag.

From tomatoes...
...to tomato juice ready for the freezer.
And since I was heating up the house to process the tomatoes anyway, I decided to make oatmeal chocolate chip cookies. And yes, I did put two dozen of them up in the freezer so we wouldn’t just eat them all!

Mmm...cookies!
And a cardinal, just because.

Friday, July 3, 2015

Chard and Goat Cheese Tart "Recipe"

I love cooking with things that I have grown myself. Chard is especially nice. It is so versatile. You can eat it in salads as a baby green. You can sauté it with a little olive oil, garlic, salt and pepper. You can add to soup. You can pretty much do anything with chard that you can do with spinach. And don’t listen to anyone who says to cut off and discard the stems. They are very tasty cooked on their own or cut into smaller pieces and mixed right into the chopped chard leaves. 

Neon lights chard tastes as good at it looks!

Years ago I came across a recipe for a rustic chard and goat cheese tart. Try as I might, I was not able to find the recipe again. I do have a vague memory of what it looked like and I’m comfortable cooking without a recipe so I decided to go ahead and try to make the tart from vague memory. (I’m sure I could have found a comparable recipe online but where’s the fun in that?) Here, then, is my “recipe.”

1. Go out into the garden and pick a good-sized bunch of chard. Rinse well, making sure to get all the grit out of the stems. There’s nothing worse than gritty chard. It makes my teeth ache just thinking about it.


Some rinsed chard with stems removed - just removed! You will use them in this “recipe.”


2. Chop up the chard leaves and stems and put into a frying pan with a little bit of water. Add a package of mushrooms cut into smaller pieces. Season with salt and freshly-ground pepper. Cook until it looks done. (Hey, I warned you this was just a “recipe.”) Keep a lid on the pan early on to help the vegetables steam then take off the lid to let the remaining liquid evaporate.


Chard and mushrooms in the pan ready to cook
3. Make a single pie crust or use a premade crust. I don’t really use a recipe for my pie crust. My dad taught me how to make pies when I was little. I used about a cup of flour, 1/3-ish cup of shortening, a little salt and enough water to make it come together for this crust. Lay the pie dough out flat on a baking sheet. Spread the chard mushroom mixture onto it and top with crumbled goat cheese. Fold the edges a couple of inches in all around.
 
Tart ready for the oven


4. Bake the tart in an oven preheated to 350 degrees for twenty minutes.

5. Realize that pie crust, no matter how thin the pie, is not pizza dough. Up the temperature to 375 degrees and bake for another 35 minutes or until crust is golden brown.


There it is!


It took a bit longer than expected but my improvised chard and goat cheese tart tasted really good. It was a bit dry, though. If I make it again in the future I’ll have to come up with a way to remedy that. Maybe I could add eggs. Of course, if I was adding eggs, I might as well make a chard and goat cheese quiche. Mmm…quiche.